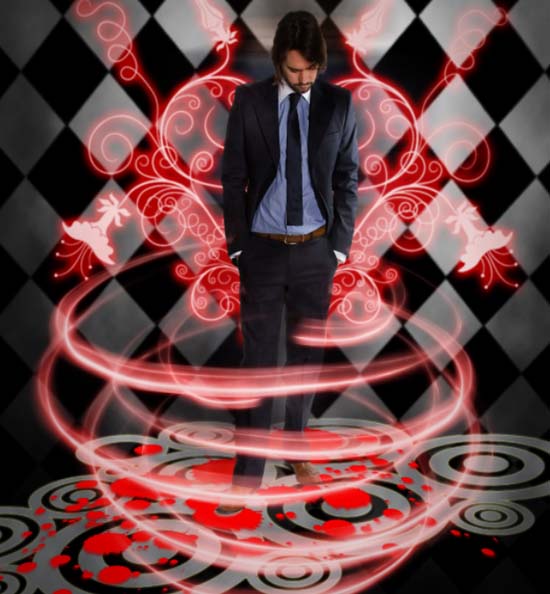
Final Image Preview

For this tutorial you’ll need an image. In this tutorial I use beautyfull fashion image from http://www.sxc.hu/photo/912668.
You’ll also need Flower Bruses , Light brush , and splatter brush , you can find those with google.
OK Lets get start
Step 1 . Ceating Background
Make a new folder , mine is 1000 X 1200 and name it fashion . Make new layer and name it Gradation 1. Next make sure the color set are default by clicking D on keyboard and pick Gradien Tool than make some gradation like in the picture bellow.

Make new project with size 500 x 500 px name it ornament , and make a new Layer on it . After that pick a Custom Shape Tools , than select one of Shape style , look at the picture


Go to Edit > Define pattern and name it ornament , so the Shape that we made before , now can be use for Pattern Overlay on Layer Style Effect

Now let's go back to Fashion project . Make a new Layer , name it ornament and fill it with a white color with clickking Alt +


Set the Foreground color to #a1a3a4 , than make a new Layer , name it floor .Next Grab your Shape tool and make some floral like on the picture bellow


Set your Foreground color to #d20000 . Grab your splatter brush , pick one of the brush style . and create some splatter . After that go to Edit > Free Tranform , and distort it to get better effect.


Step 7.Bring The Model .
Open man image tha you have been download . Make Selection on Man with Magic Wand Tool . After that drag man image into the project.


Create new layer under man image , and grab your flower Brush and make some floral like in the picture , and don't forget to bring layer style effect , here the setting .


The image would be like this.

Grab light Brush that you have been download , and make some twirl light in front bottom of man picture ( look at the picture ), and give Layer Style Effect with this setting .


Next , duplicate light layer and go to Edit > Free Tranform than flip it Horizontal.

Make new layer on top . Make sure your color set are default by clicking D on keyboard. Next go to Filter > Render > Claud , than change blending option into Color Burn.