
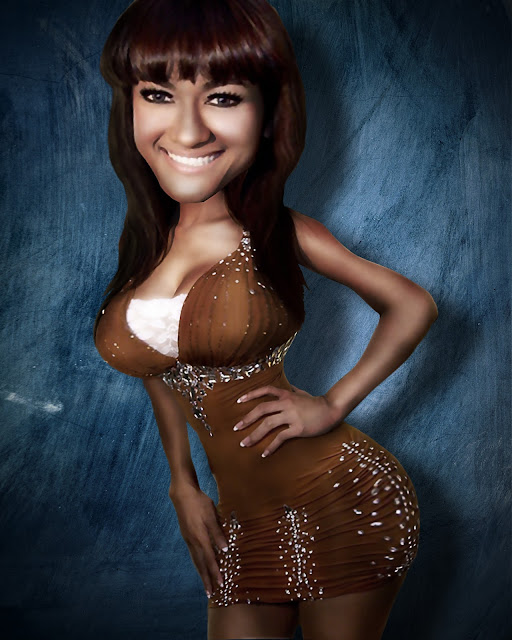
Final Image Preview

In this tutorial we'll made some caricature picture using photoshop . In this tutorial im using girl image for model and texture image for background , you can apply this technique in your own photo.
Ok lets get started
Step 1
Create new project on photoshop , name it model . After that create new layer and fiil it with dark green color

Step 2
Open girl image and make selection on the girl with pen tools or other setection tools, after that bring the girl into project with move tools


Step 3
selection area that has not been cleaned from the image background with pen tool or other selection tool , after that click delete on keyboard to clear that area
.


Step 5
Go to Filter > Linguify than trim the hair model , also use clone stam tools in the proses , after that use again linguify then manipulate the image to look like in the picture below.

Step 6
Merge body layer and the head layer , after that go to Filter > blur > surface blur and give it settings as shown in the picture

Step 7
Grap smudge tools than brush over than rub the face and body that looks more refined . After that use the burn tool and brush on the dark side of the model, then use thedotge tools then brush on light areas of the model. The model wiil be like this.

Step 8
Duplicate the model than go to Filter > other > high pass , set to 5 px than change the blending into hard light

Step 9
Open some texture image and replace above the background, next go to image adjustment than settings as shown.


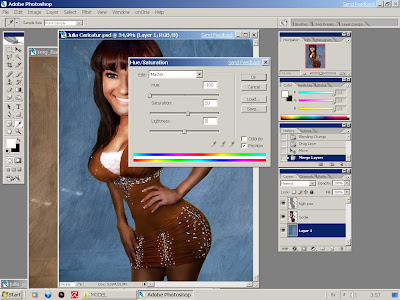
Step 10
Still on texture image , go to > image > adjustment > level than set like on picture bellow

Step 11
Create new layer above texture layer , than fill it with white color , after that go to > Filter > lighthing effect ,than select 2 o clock lighthing effect . change the blending of layer to multiply.

last step
Create new layer on top than go to layer > new adjustment layer than select black white style and reduce the oppocity to 30 %.

Here the final image again

In this tutorial we'll made some caricature picture using photoshop
Ok lets get started
Step 1
Create new project on photoshop , name it model . After that create new layer and fiil it with dark green color

Step 2
Open girl image and make selection on the girl with pen tools or other setection tools, after that bring the girl into project with move tools


Step 3
selection area that has not been cleaned from the image background with pen tool or other selection tool , after that click delete on keyboard to clear that area
.

Step 4
Selection the head model with polygon lasso tools , after that click Ctrl + X on keyboard to cut the selection , next click Ctrl + V to paste the head model into new layer then enlarge the size of the head model


Go to Filter > Linguify than trim the hair model , also use clone stam tools in the proses , after that use again linguify then manipulate the image to look like in the picture below.

Step 6
Merge body layer and the head layer , after that go to Filter > blur > surface blur and give it settings as shown in the picture

Step 7
Grap smudge tools than brush over than rub the face and body that looks more refined . After that use the burn tool and brush on the dark side of the model, then use thedotge tools then brush on light areas of the model. The model wiil be like this.

Step 8
Duplicate the model than go to Filter > other > high pass , set to 5 px than change the blending into hard light

Step 9
Open some texture image and replace above the background, next go to image adjustment than settings as shown.


Step 10
Still on texture image , go to > image > adjustment > level than set like on picture bellow

Step 11
Create new layer above texture layer , than fill it with white color , after that go to > Filter > lighthing effect ,than select 2 o clock lighthing effect . change the blending of layer to multiply.

last step
Create new layer on top than go to layer > new adjustment layer than select black white style and reduce the oppocity to 30 %.

Here the final image again


